
Inside: Lazy Daisy Embroidery Tutorials.
I’ve found that some of the cutest embroidery styles are the ones that are plain and simple. It’s a nice feeling to be able to finish an embroidery piece in just one sitting, it can be more fun that way.
So the perfect stitch you can do to achieve this is a Lazy Daisy Stitch!
Lazy Daisy Stitches are one of the most popular simple embroidery patterns that you can do. They are fun, adorable, and super easy to achieve!
So if you are a beginner, this is the pattern for you. Not only will you be able to do it with ease, but you will have amazing daisies to show for it. I’ve gone ahead and created 3 tutorials for different styles of lazy daisies to get you started. Here is the supplies you will need:
Supplies
- Embroidery Hoop
- Fabric
- Needle & thread
- Pencil
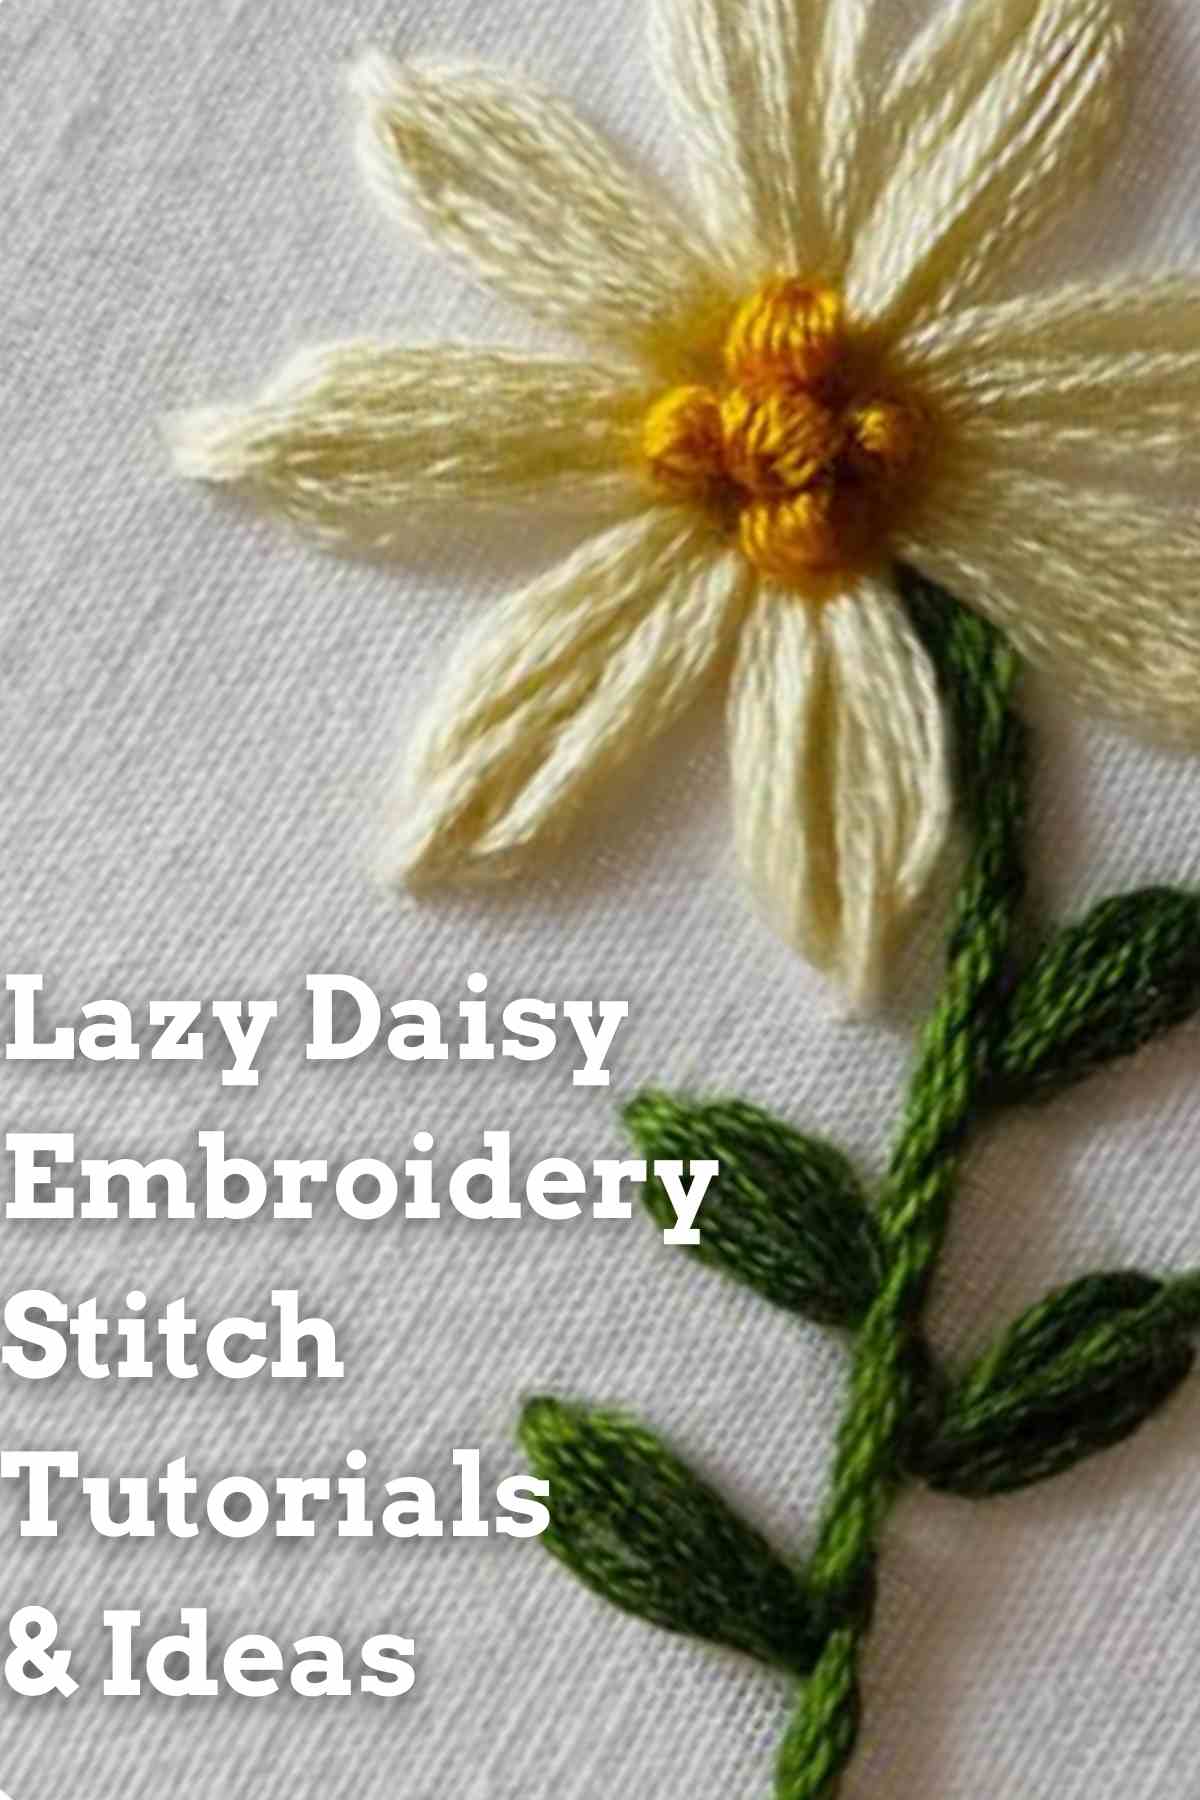
1. How To Do a 10 Petal Lazy Daisy Embroidery
First things first, before we even pick up the thread and needle we are going to need a sketch! So grab a pencil or transfer pen and sketch out a simple daisy with 10 petals, but instead of drawing each petal, you are going to want to evenly space 10 dots where the top of each would be. This will be our guide.
Step One
Bring the needle up through the back through the line of the center circle.
Step Two
Then you are going to put the needle right back down through the fabric next to where it came out, but do not pull it all the way through. Instead, weave the needle through the fabric with the point coming out at one of the dots we drew earlier. This will be the length of your daisy petal.
Step Three
Take your thread and wrap it around the needle. This process is very similar to a chain stitch. Now you can pull the thread all the way through, you will see that it creates the perfect loop. If you want a more narrow petal, keep pulling the thread until you get your desired result.
Step Four
Next, we will be anchoring the loop by bringing the thread down just on the other side of it. Once anchored and it is all set, you have created a petal!
Step Five
You can repeat these steps until all 10 petals are finished.
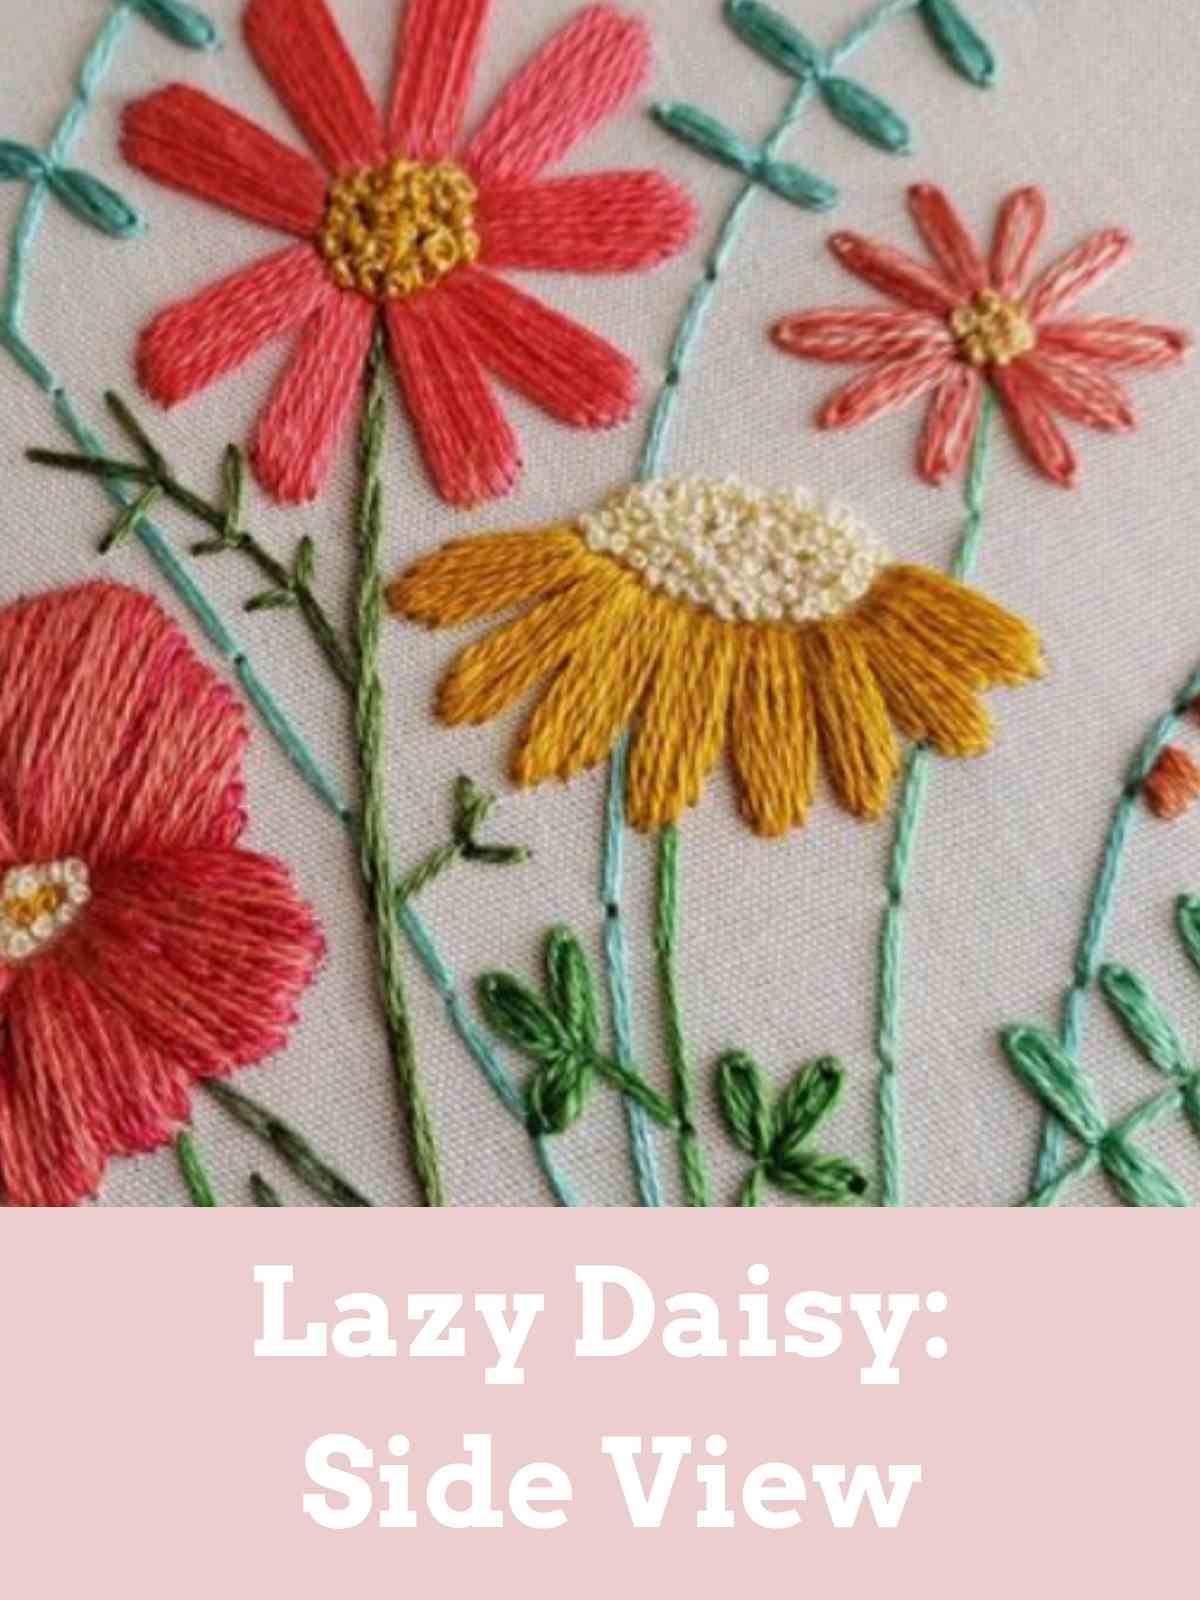
2. How to Create A Lazy Daisy: Side View
This next one is very similar to the first but from a different angle, giving the flower a different, more droopy and cute look. It’s fun to try your hand at different views when embroidering.
Before we begin with our thread, again we are going to sketch out our guide. This time instead of making a perfect circle surrounded by dots, you are going to want to draw a long horizontal oval shape that is more flat on the bottom side. This will be the center of the daisy. Then you will draw 8 dots in a smile crescent shape just underneath it. These will be the tip of your petals.
Step One
Starting on the bottom side of the oval, Bring the needle up through the back through the line.
Step Two
Then you are going to put the needle right back down through the fabric next to where it came out, but do not pull it all the way through. Instead, weave the needle through the fabric with the point coming out at one of the dots we drew earlier. This will be the length of your daisy petal.
Step Three
Take your thread and wrap it around the needle. This process is very similar to a chain stitch. Now you can pull the thread all the way through, you will see that it creates the perfect loop. With this style of daisy, more narrow petals look best, keep pulling the thread until they become thinner.
Step Four
Lastly, we will be anchoring the loop by bringing the thread down just on the other side of it. Once anchored and it is all set, you have created a petal!
Step Five
You can repeat these steps until all 8 petals are finished. You can create a stem by using green thread and repeating this looping technique. Instead of leaving it wide like a petal, pull tightly until it is straight like a stem.
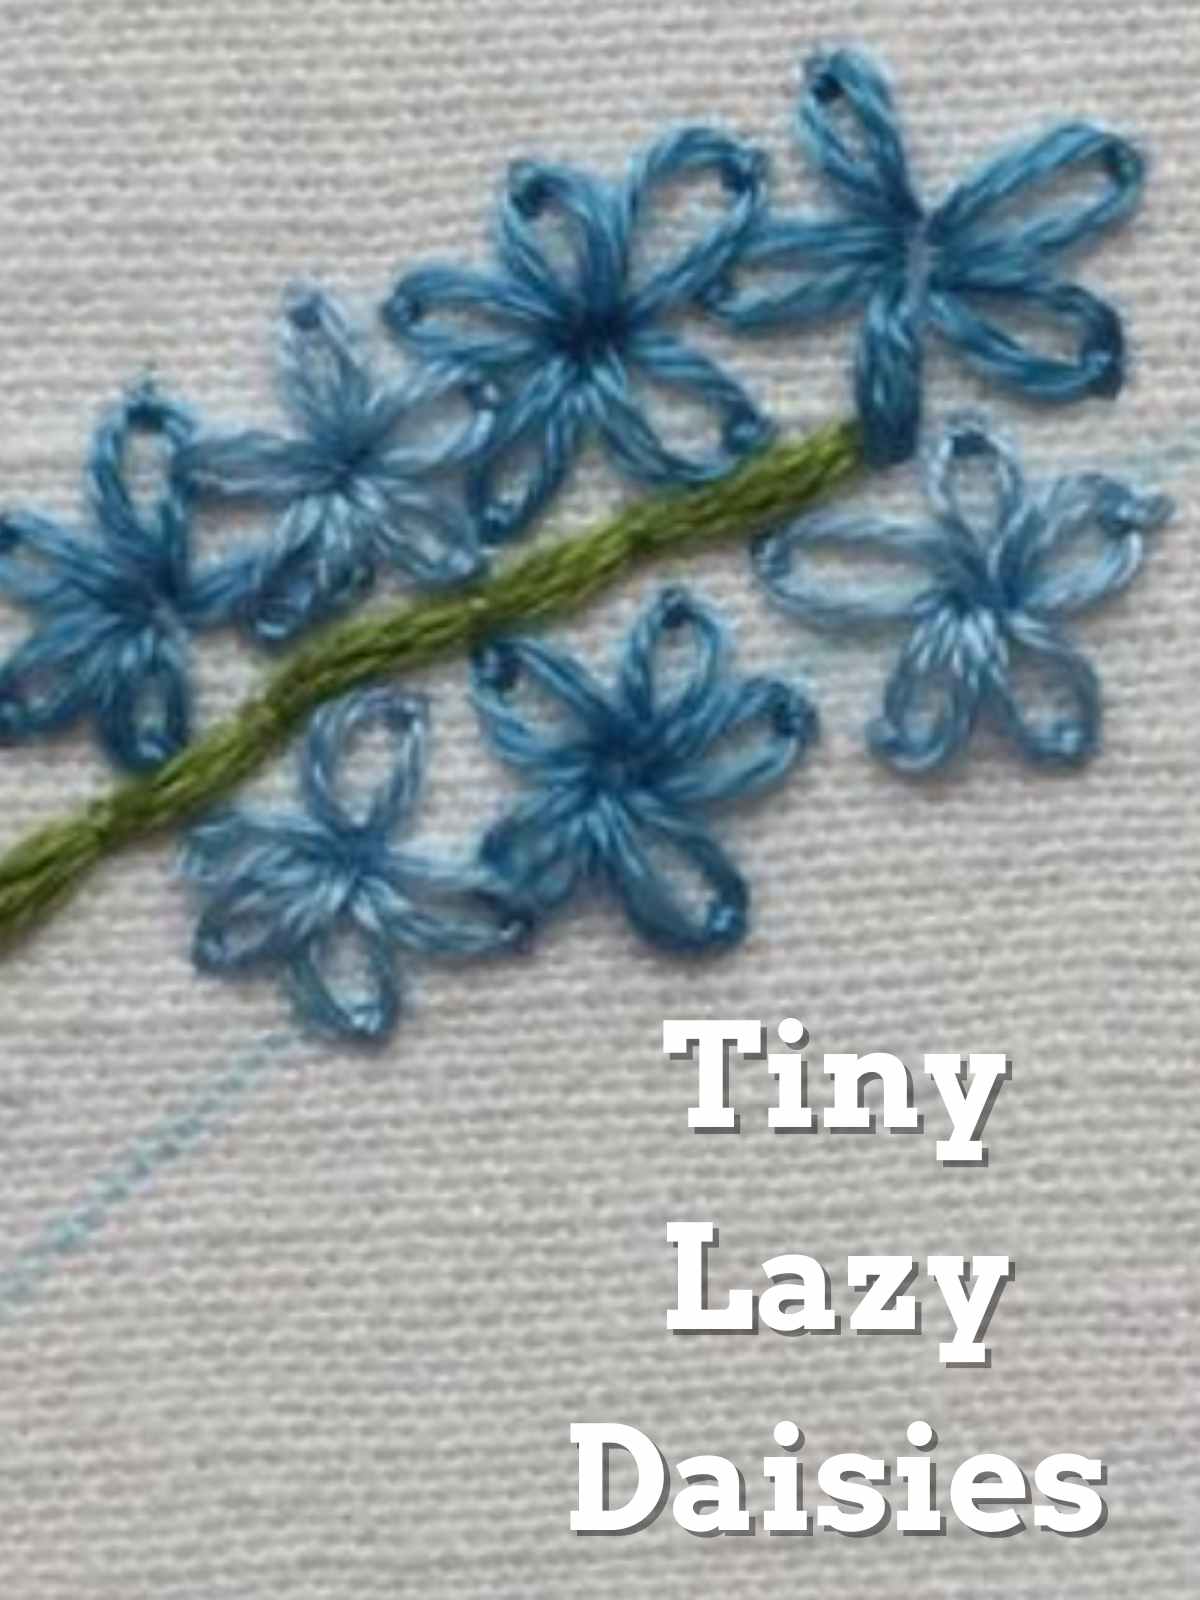
3. How to Make A Tiny Lazy Daisy
This one has the same steps as the ones above but on a much smaller scale. Instead of drawing a circle, you are going to make a dot surrounded by 5 other dots evenly spaced around it.
Step One
Bring the needle up through the back through the line of the center dot.
Step Two
Then you are going to put the needle right back down through the fabric next to where it came out, but careful not pull it all the way through. Instead, weave the needle through the fabric with the point coming out at one of the dots we drew earlier.
Step Three
Take your thread and wrap it around the needle. This process is very similar to a chain stitch. Now you can pull the thread all the way through, you will see that it creates the perfect loop. If you want a more narrow petal, keep pulling the thread until you get your desired result.
Step Four
Next, we will be anchoring the loop by bringing the thread down just on the other side of it. Once anchored and it is all set, you have created a petal!
Step Five
You can repeat these steps until all 5 petals are finished.
There you have it! 3 simple Lazy Daisy Embroidery Tutorials. If you are eager to get started, check out these 11 examples of lazy daisy embroidery to get your creative juices flowing. There are so many different cute ways you can make this kind of embroidery your own it’s amazing!

Daisy Embroidery Stitch Ideas
2. Daisy Chain
I hope you found something you love! Next, take a look at some of the links below. These will take you on your next embroidery adventure!
More Ideas You’ll Love
- How to Display Embroidery In A Hoop, Frame, & On The Wall – Once you have finished your piece, you get to display it! There are many different ways this is done; in a frame, hoop, or on the wall. Whichever way suits your decor style is the best one you can go with. Check out this how-to on how to display your adorable artwork.
- How to Thread An Embroidery Needle – Though this concept may seem pretty straight forward… it is much harder than it sounds.It can be one of the most irritating parts of embroidering. Not only can you prick your fingers, but it can take FOREVER to finally get it through. The good news is that I have created a little tutorial to help you reduce this stress. Check it out.
- 37 Gorgeous Butterfly Embroidery Pattern Ideas – Now that you have your needle threaded, how about trying your hand at some adorable butterfly embroidery? I’ve made a list of 37 of the most gorgeous patterns you can find on the internet to get you started.