
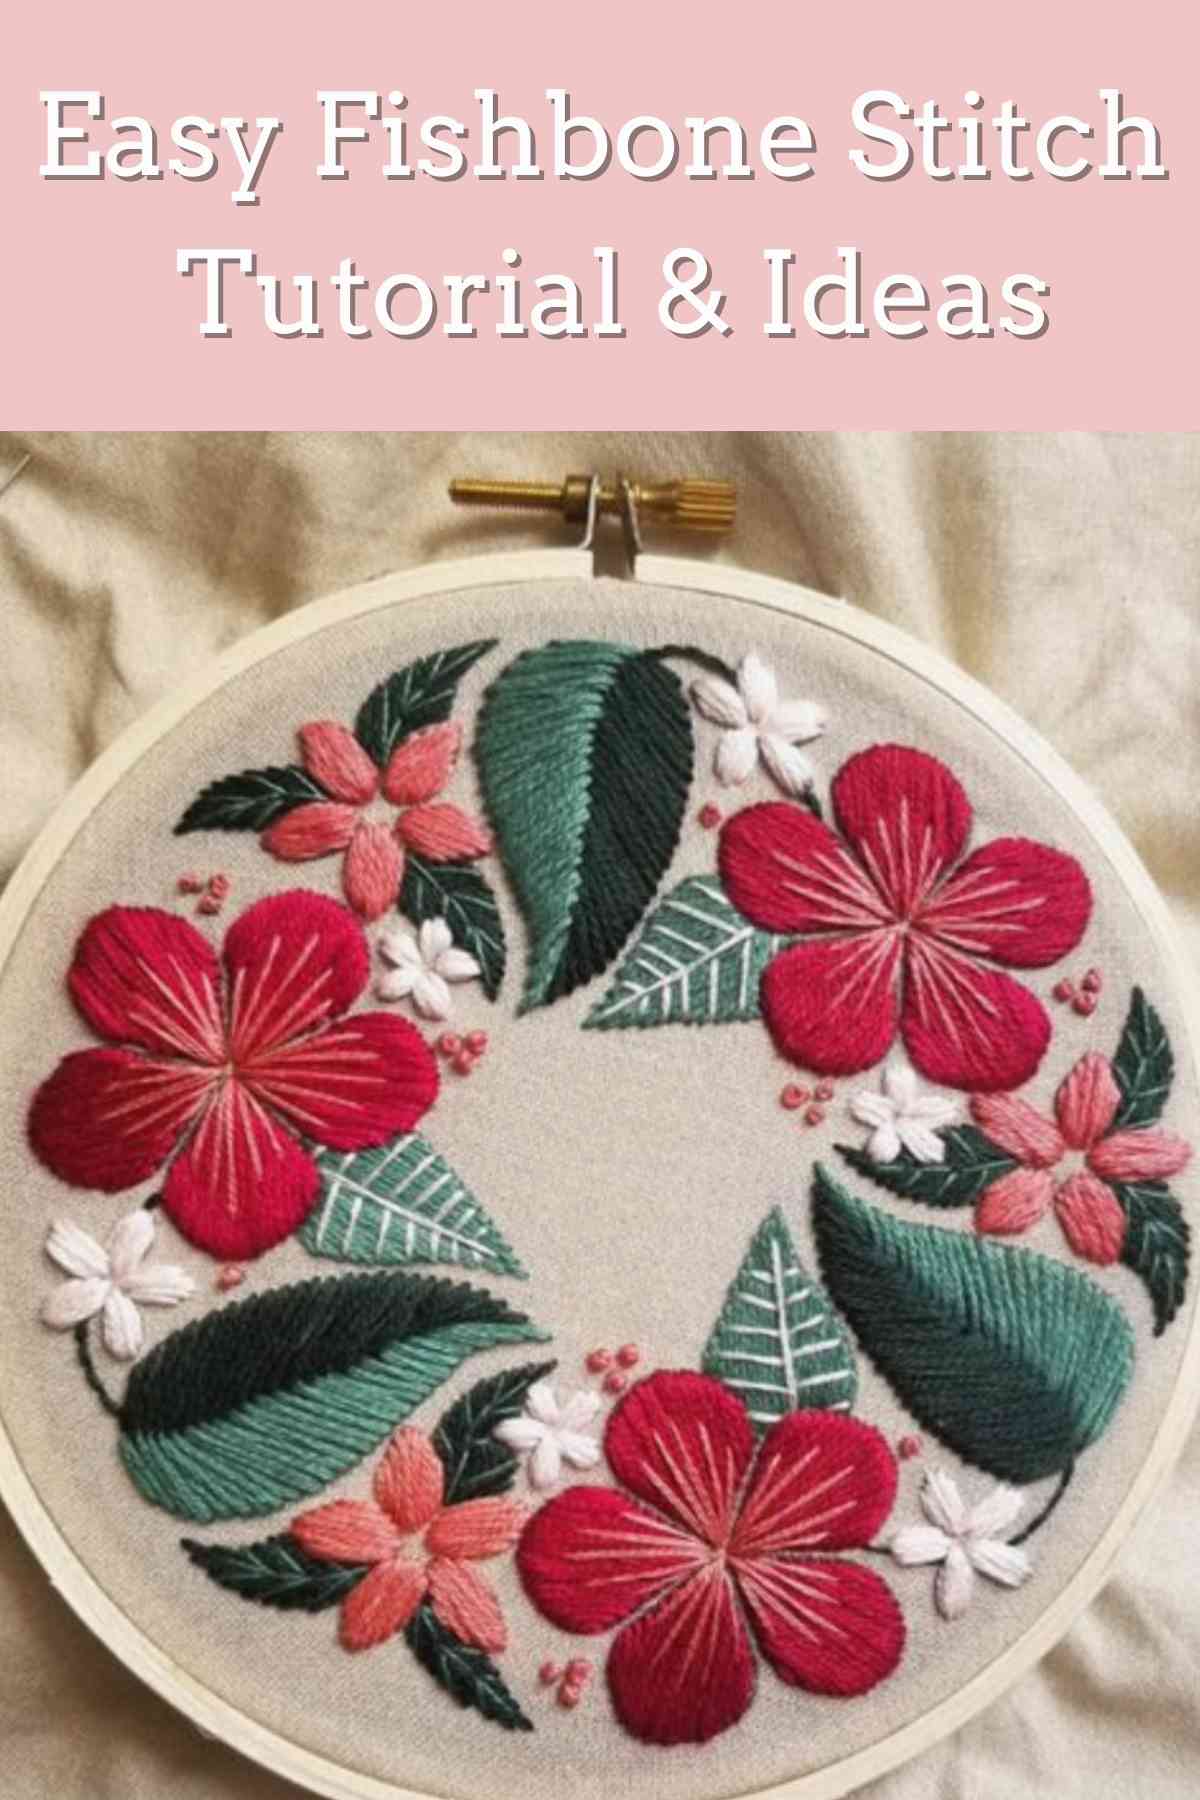
Inside: How to Achieve the Fishbone Stitch
When it comes to embroidery, learning a new stitch can feel like it has a permanent place on your to-do list. Your feelings are not wrong! But this isn’t a bad thing, in fact, it’s quite the opposite. I’ve found that with each new stitch I add to my arsenal, I become a more competent and confident embroiderer.
If you are at the beginning of learning to embroider, it can feel like a lot all at once. But the good news is that you don’t need to learn them all at once!
Take it one at a time and you will still be able to create some amazing designs and pieces.
With every new stitch, you get to create something brand new to you. This is a beautiful thing! I also don’t think that embroidery is something that you fully learn.
I think you can constantly be learning new things, new stitches, and new tricks, for your entire life.
That’s what makes it such a good hobby: you’ll never get bored!
Once you get a good handle on your basic stitches, you get to just keep working up the ladder until you are a master at your craft. It’s a learning process that has worked for centuries. Just keep challenging yourself and you will never stop improving. Too much at one time can leave you forgetting what you’ve learned, so I recommend really taking some time when you learn a new stitch to use it as much as you can until it is ingrained in you.
I love to help my fellow embroiderers along their path as they learn more and more. So I like to make tutorials on how to achieve some of the best and most handy(and cute) stitches out there. Today, we are going to be focussing on one of my absolute favorite stitches: The Fishbone.
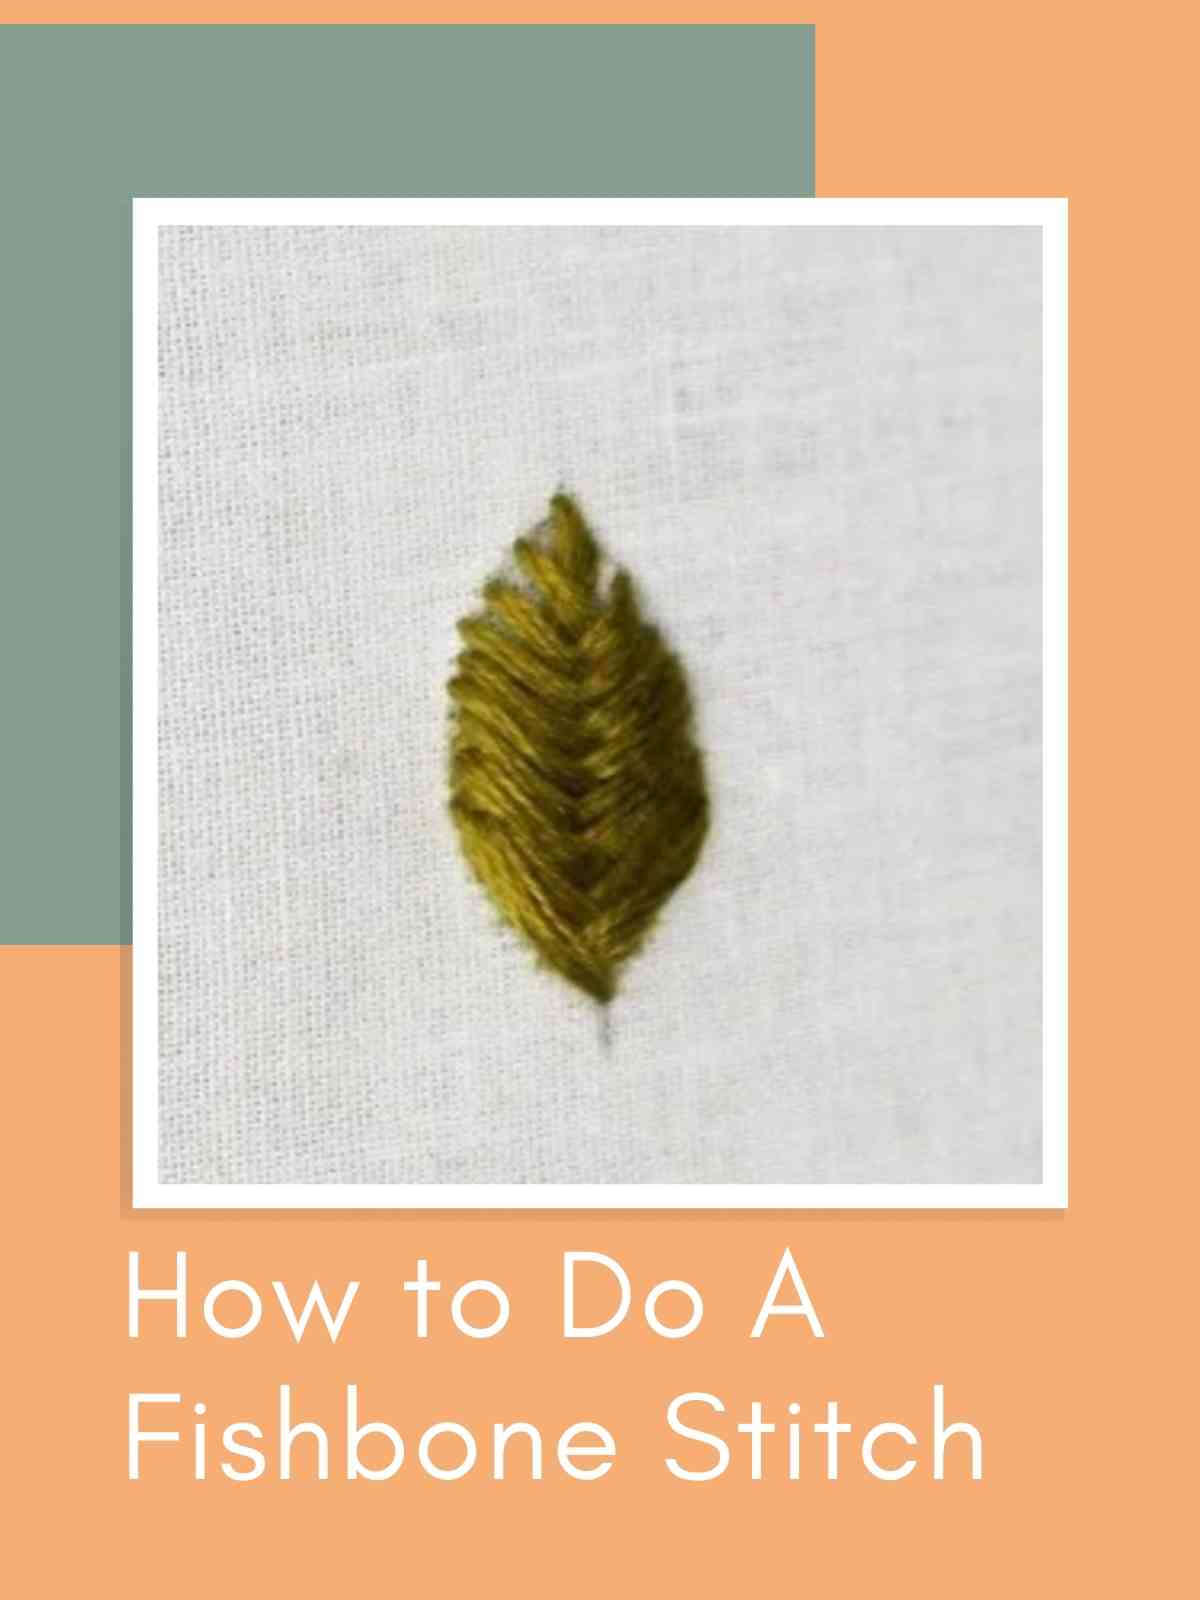
What is A Fishbone Stitch?
This is the perfect stitch for creating leaves and feathers because of the alternating pattern in which you sew. It’s divided down the middle and goes in opposite directions so you will find that the end result exactly resembles the pattern that is found naturally in a leaf or in a feather.
If you like to braid, you may be reminded of the fishtail braid, which ends up with a similar look as this handy little stitch.
It’s pretty simple once you get the hang of it, I have found that there is a bit of a learning curve in the beginning but ultimately it is a very easy stitch to achieve! You can include it when you are embroidering a set of flowers or birds, and to anything else, you put your mind to! So let’s get into it.
Oh, and after you are finished perfecting your new stitch, keep scrolling to find some great examples of it in action. These can help to get your creative juices going when you create your own full project that incorporates the fishbone stitch.
How to Do Fishbone Stitch
Okay, so for this process I am not going to make anything in particular, I’ll just be showing you the stitch. That way you can use it however you like. If it helps you though, you can lightly draw a leaf on your canvas, the line down the middle will be the line we work with down below in the tutorial. If you look at the photo examples above while reading, you will be able to get a good idea of how it will go, and how your embroidery should look when it is finished.
Step one
First, draw a light line going down the canvas, this will be our guide for the stitch.
To begin you are going to start by putting your needle and thread out through the underside of the hoop canvas at the top of your line. Then you will bring it back down about one centimeter underneath it.
Step Two
Next, you are going to bring the needle back up through a point very close to your first stitch, but slightly lower. Then you will put it through right next to the point that you made the second stitch.
Do the same thing to the other side, alternating each time you make a new stitch. Make sure to avoid any gaps by making the stitches close together.
Step Three
Continue alternating between sides. You will start to notice the lattice starting to form as well as the spine going down the middle. Just think of the awesome designs you’ll be able to achieve once you master this stitch!
Let’s take a look at some other designs that use this stitch.
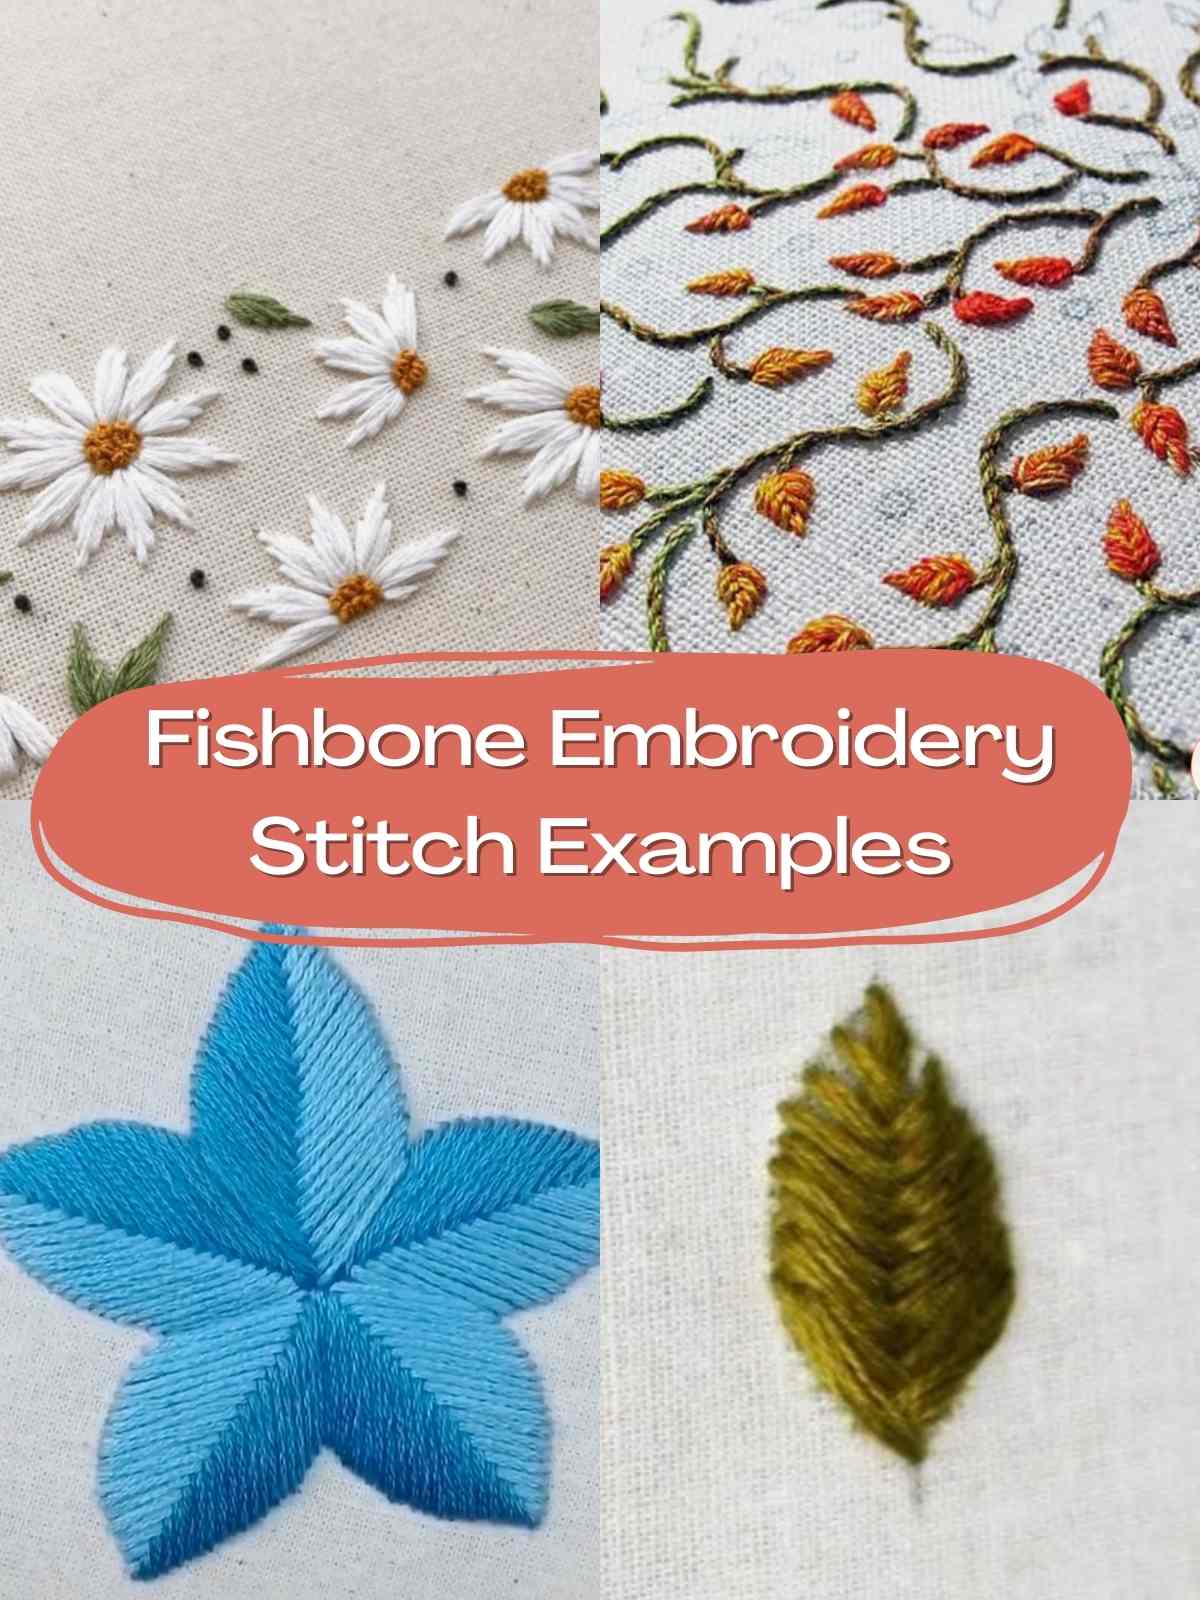
Fishbone Embroidery Stitch Examples
As you can tell, this stitch is primarily used for nature-based things. I’ve included some great examples of what this stitch looks like as well as some cute designs that use it to their advantage. One thing I really love about embroidery is how you can take one thing, and create it differently hundreds of times. Chances are, so far in your embroidery journey, you’ve created a leaf or two during your projects. But I bet none of them have the same flair as the leaves you will create using the fishbone stitch.
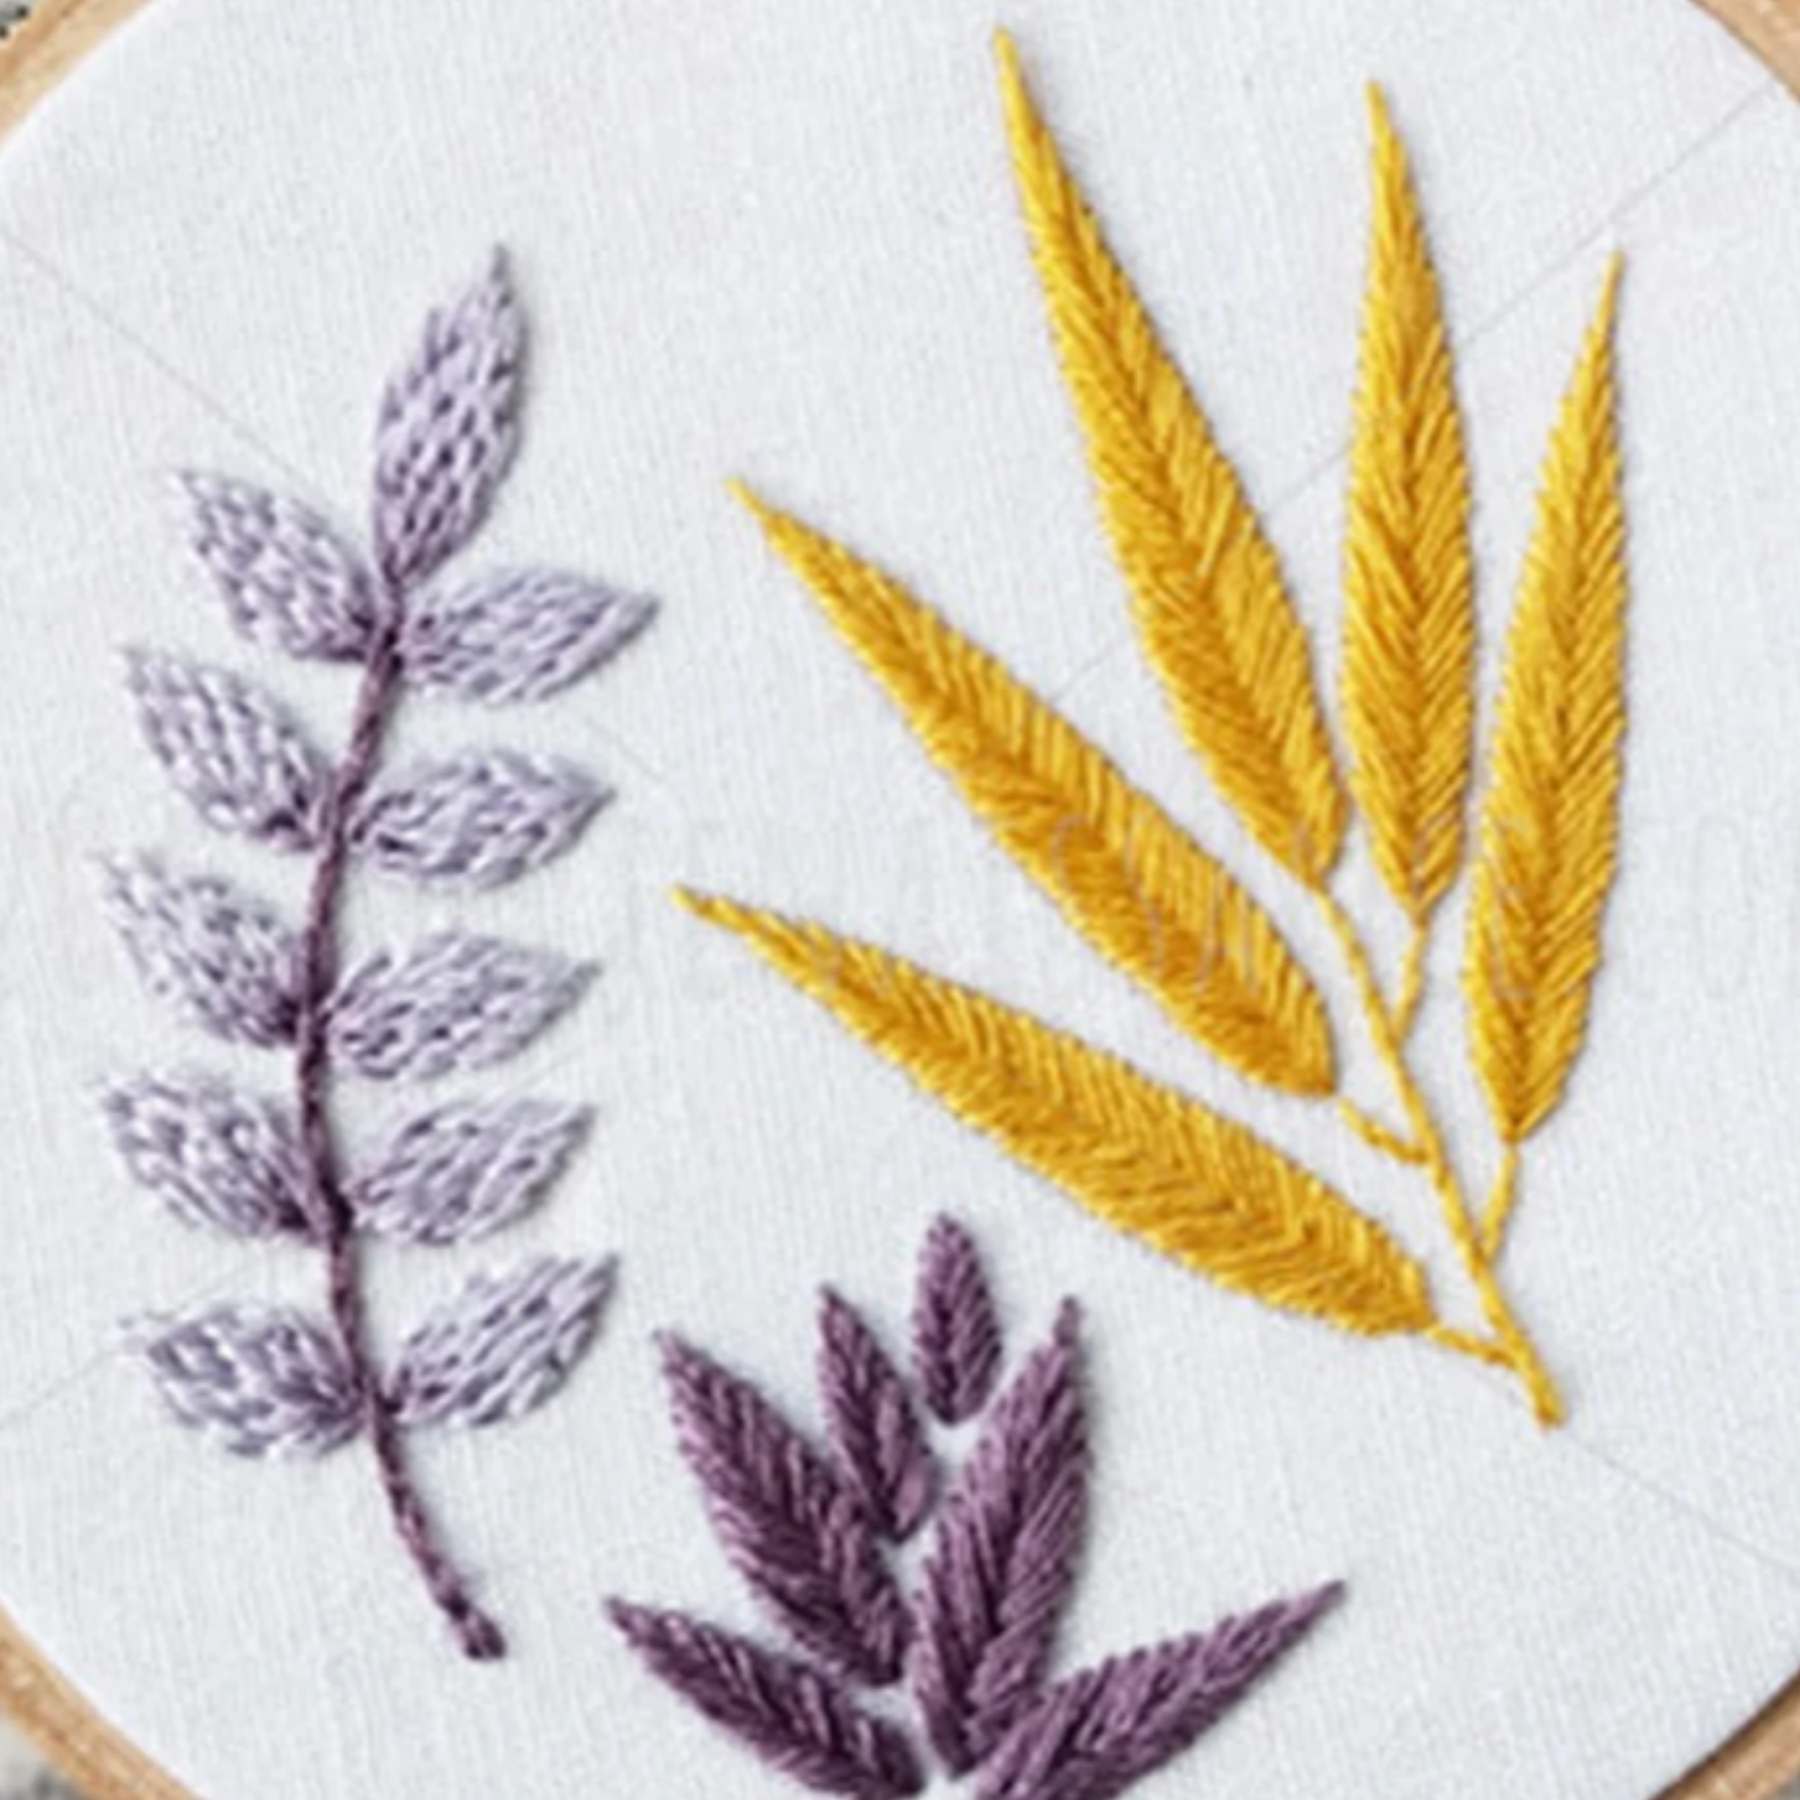
6. Floral Hoop
7. Cute Purple and Yellow Fall Leaves
See, what did I tell you? There are so many beautiful things you can create with different stitches! I hope you loved learning how to do your own fishbone stitch, as well as seeing the different kinds of designs you can make with it. There is definitely so much still to learn, so how about you take a look at the ideas listed below to get you started on your next lesson!
More Ideas You’ll Love
- How to Do Brazilian Embroidery + Easy Patterns – If you loved learning how to do a fishbone stitch then you are going to go crazy for this tutorial on Brazilian embroidery. Brazilian embroidery is a cool 3-D topographical form of embroidery that brings dimensions to your work. Take a look at the examples given here, as well as a step-by-step guide to achieving some of the main stitches used in this form of embroidery.
- 33 Beaded Embroidery Patterns + Best Thread for Beading – Beaded embroidery is another one of the greats. This is when you incorporate beads onto your stitches and the end result is AMAZING. Check out these awesome pattern Ideas + some tips for getting the best thread for the project.
- How to Thread An Embroidery Needle – When you are first starting embroidery, threading the needle can be one of the most annoying and painful parts of the process. Lucky for you, I’ve created a guide that will help you to avoid unnecessary finger pricks and annoyance. Take a look at my tutorial on How to Thread an Embroidery Needle.